

Tools and Supplies:
- Chain nose pliers
- Round nose pliers
- Wire cutters
- Hammer
- Miniature Horn Anvil
- File
- Maas Polishing Creme
- Polishing pads
- Liver of sulfur
- 16-gauge copper wire – 30 cm
- 18-gauge copper wire - 60 cm
- 20-gauge copper wire - 16 cm
- 26-gauge copper wire - 3 m
- copper beads 3 mm – 2 items
- copper beads 5 mm – 2 items
- faceted briolettes 8x12 mm - 2 items

I like to work with copper. This is a great metal. It can change its properties. Sometimes I can make it soft, sometimes it's hard. And I'm absolutely in love with this light pink color. It combines well with green and blue-colored stones.
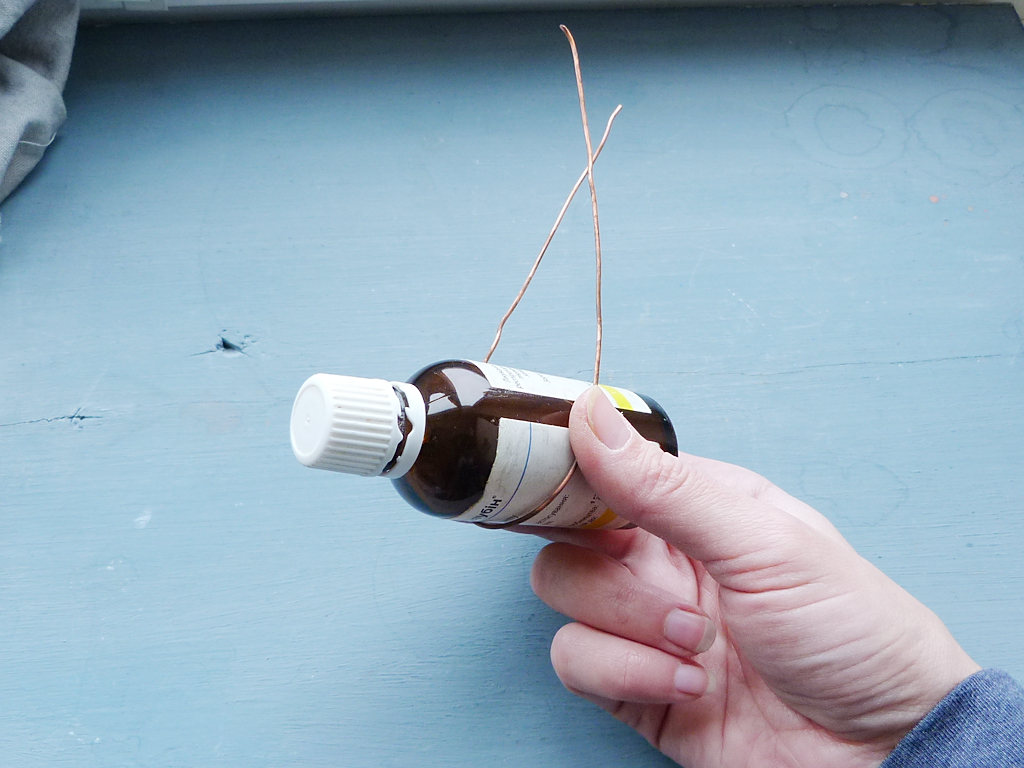
Take 15 cm of 16-g wire and make the 2 circles around any cylinder (the diameter about 35 mm).


Make the loop on the one end of the circle. And cut off the extra wire on the other side.


Flatten the wire with the hammer. Work only on the back side. And hold the hammer in parallel to horn-anvil. Align the loop.


Make the second loop and smooth the end.


Take 30 cm of 18-g wire and make another one circle around the cylinder. Combine it with a flat circle. Take 80 cm of 26-g wire, find the middle and start the weaving.

Make 10 identical pieces of the pattern.


Make the pattern like this (you can print my scheme and use it). Try the briolette. The loop should be slightly larger than the briolette.


Unbend the pattern and flatten it. I like to work with a round wire. Because I can use the hammer at any time and make it flat in any place. I can feel the line better. This process reminds me of calligraphy.


Continue the weaving. And then make the bottom layer of pattern like on scheme.


Fix the loop, continue the weaving with beads.


Fix the briolette. I make 2 coils near the briolette and around it. And then weave to fix all elements of the pattern.


Take the 8 cm of 20-g wire. Flatten and smooth the end. Then fix it by the tools and turn around several times. We should make it more strong. Because we will use it for making the closure. And this part of earrings should be safe.


Make the ear wire and connect it to the earring. Smooth the end. Now you can make the closure thin bu file to make it more comfortable. Almost done!


I like the vintage look of jewelry. Dip the earrings into a warm solution of sulfuric liver and wait a few minutes. Then use polishing pads, Maas Polish cream or another polishing paste.


Wash them carefully. And I recommend covering copper with a special varnish. This will keep the shine of metal for a long time.


Please tell me in the comment, which textbooks are of interest to you? Are you ready for work with a butane torch? Thanks for following me!
Thank you for your tutorial. I was waiting for another one. Im interested on wire weaving and beading tutorials textbooks.
ReplyDeleteIm ready for work with a butane torch.
Many thanks for your feedback! Great! So we will continue! :)
DeleteThank you so much!! Would love to learn more, and how to use my butane torch!! :)
ReplyDeleteGreat! Many thanks for your feedback! :)
Delete